
Service pageSources checked
At a glance
Flooring Installation: scope, budget and approvals
Andymax’s flooring installation guide is $5–$18 per square foot before HST across different material choices. Confirm whether supply, removal, preparation, stairs, trim and transitions are included; the rate alone does not define them. Choose a product and installation method suited to the room and assessed substrate. Moisture testing, preparation, product requirements and occupied-home access determine the sequence and return-to-use date.
- Scope
- Flooring installation across different products. Clarify supply, removal, base preparation, stairs, trim and transitions before comparing rates.
- Planning range
- $5–$18 / sq. ft. · Flooring installation across a range of material choices. CAD before HST. Inclusions, exclusions and assumptions
- Permits
- A surface-only project has a different scope from structural floor repairs or changes to services. Confirm expanded work with the municipality and building management where relevant.
- Timing
- Moisture assessment, substrate preparation and the selected product’s installation requirements precede return to use. Include furniture and appliance moves in the plan.
Part of Home Renovations
A closer look
Flooring Installation in pictures
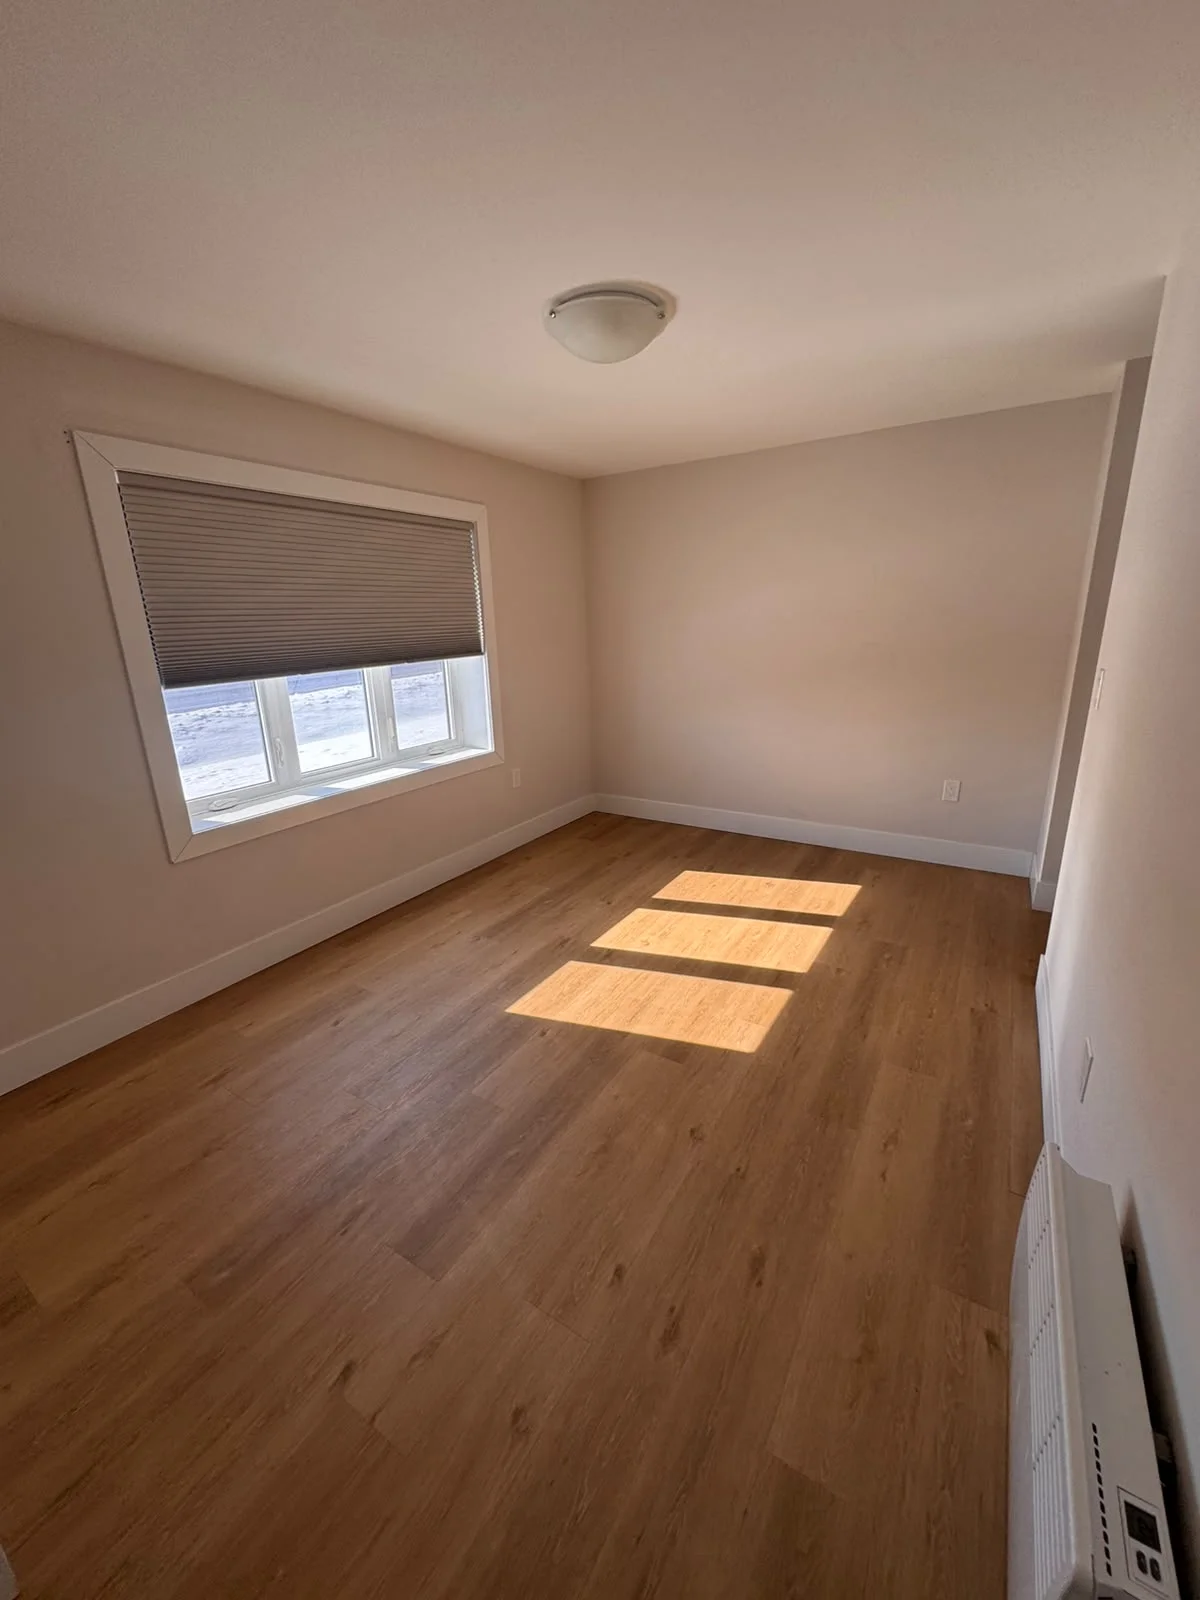
Compare flooring by product, room and substrate
A material-family name is not an installation specification. Select the actual product and review its approved locations, substrate and maintenance requirements. The comparison below identifies useful questions without claiming that every product in one family performs the same or can be installed over an unresolved moisture condition.
| Material family | Selection questions | Preparation and specification |
|---|---|---|
| Solid wood | Do the household’s desired appearance and maintenance expectations suit the actual species, finish and room conditions? | Specify the selected product, installation method and moisture assessment. Check the base and room conditions against its requirements instead of assuming a generic timber floor method is suitable. |
| Engineered wood | What is the wear layer, finish and available product support? Is its intended installation location approved by the manufacturer? | Identify the exact construction and approved fastening, adhesive or floating method. Engineering a board in layers does not make it exempt from moisture and substrate requirements. |
| Luxury vinyl | Does the product suit the intended room, traffic and appearance, and what do its stated water claims actually cover? | Choose the specified product, joint or adhesive system and approved underlayment. Clarify base preparation and moisture conditions; water-resistant surface marketing is not a repair for building water entry. |
| Laminate | Compare surface, edges, sound and product-specific use conditions. Do not assume that all laminate products share a waterproof claim. | Specify the manufacturer’s approved rooms, underlayment, joint details and maintenance. The selected product’s instructions should govern compatibility rather than an informal label such as waterproof flooring. |
| Tile | Consider the full tiled assembly where a harder surface, particular pattern or wet-area finish is intended. | Assess support, substrate and relevant water-management requirements. Use the tile-work guide to define preparation, edge and setting-system scope separately. |
Flooring preparation, installation and return to use
The programme should state how rooms are emptied, how the substrate is assessed and when furniture can return. Product conditioning, adhesives and finishes may introduce requirements that vary by system. A single flooring rate does not establish those periods or the scope of floor repair.
- Measure the rooms and boundaries
Record each area, stairs, closets and transitions. Select a direction or pattern and identify retained floors. List furniture and appliance moves, access needs and the planned final trim so quantities and responsibilities are clear.
- Assess the substrate and product
Evaluate the base and moisture conditions for the chosen system. Confirm product suitability and any investigation needed beneath old finishes. Specify preparation from the assessed condition rather than assuming every floor is ready for immediate installation.
- Remove and prepare
Complete the agreed removal, disposal and base work. Document additional damage or unsuitable conditions and approve the revised scope. Resolve floor levels and transitions before the finished surface makes correction more difficult.
- Install the selected system
Follow the actual product and installation requirements, including approved underlayment or adhesive and relevant conditioning. Coordinate doors, stair parts and trim. Protect finished areas while other work or room moves continue.
- Review and resume use
Check the specified appearance, transitions and completed edges. Follow product requirements for loading, cleaning and return to use. Keep installation and care documents and identify remaining corrections before the room is fully refurnished.
Price the floor area and its preparation separately
Andymax’s $5–$18 per-square-foot guide covers flooring installation across a range of material choices, before HST. For illustration only, multiplying 600 square feet by the guide gives $3,000–$10,800; that is not a complete quotation. Confirm whether the particular proposal includes product supply, removal, base preparation, underlayment, stairs, trim and transitions. Stairs and numerous doorways can add work that a flat room-area comparison misses. Define repairs and levelling from an assessment rather than assuming a standard preparation allowance covers all conditions. Include furniture or appliance handling, disposal and final trim painting where required. Owner-supplied flooring needs a delivery, quantity and suitability responsibility, including how damaged or insufficient product is handled. A pattern or direction can change cuts and material quantity, so settle it before ordering. The pricing guide provides the published orientation. Compare the same product, measured area and edge details across estimates so a cheaper surface rate does not obscure a different preparation or completion scope.
Keep moisture assessment and underlayment product-specific
The substrate must be evaluated in relation to the selected floor. NWFA guidance for wood-floor installation addresses moisture, base condition and manufacturer requirements. The appropriate tests and acceptance conditions depend on the actual product and installation, so record those requirements with the scope. A dry-looking surface does not establish that the assembly is ready. Underlayment also has to suit the product and substrate; a thicker or more expensive option is not automatically a compatible substitute. Mannington’s installation resources illustrate why manufacturers issue specific directions rather than one method for every resilient floor. For a basement, assess water problems before covering the slab and refer to the basement guide for the larger repair and service sequence. In condominiums, obtain the building’s actual approval and sound-related requirements before ordering; do not assume a product’s advertised acoustic number alone establishes compliance. Keep any flooring-only quote separate from structural repair or moisture remediation. Those boundaries help an owner understand the installation price and the conditions that must be resolved first.
Map each room, edge and change in level
A flooring plan should show more than a total area. Measure the rooms and note closets, angled walls, landings, stairs, doorways, built-ins and fixed cabinets. Mark where flooring changes to tile, carpet or an existing surface. These boundaries determine transition strips, cuts, trim and the direction of planks. Check whether an added floor layer would affect door operation, appliance clearance, stair geometry or a threshold at an exterior door. Walking the route between rooms can reveal an uneven change in level that is easy to miss on a square-foot estimate. If one area is renovated later, decide whether to extend the same material now or leave a deliberate transition for future work. Photograph existing cracks, soft spots, stains or loose boards before work begins. A measured, room-by-room schedule helps ensure the quote covers the spaces you expect, including closets and alcoves. It also makes material ordering and waste allowances more realistic than one broad whole-house number.
- Mark every doorway, stair and transition on the plan.
- Compare quotes against the same room list and measured area.
Evaluate moisture before choosing a product
Moisture conditions influence both the product and the installation method. Ask whether the floor is above a basement, directly over concrete or near an entry, laundry, kitchen or bathroom. Look for past leaks, recurring condensation, damp odours and staining. A product described as water resistant still has installation limits, and a surface layer does not correct a moisture problem below it. Review the flooring manufacturer's instructions for the intended room and substrate. If the existing finish is removed, reassess the base before ordering final preparation work; hidden damage or old adhesive may change the plan. Basement projects deserve particular attention to slab conditions and seasonal moisture. Discuss how the installer will assess suitability and what happens if readings or observed damage do not support the proposed method. Keep any needed moisture-control or repair work as a named part of the estimate rather than assuming it is included in a general installation line.
- Identify rooms with water exposure or a history of dampness.
- Confirm substrate and moisture requirements for the exact product.
Compare material families by use and upkeep
Solid wood, engineered wood, laminate, resilient plank, tile and carpet offer different feel, repair options, noise, maintenance and installation requirements. A showroom sample cannot tell you how the product will perform on the existing subfloor. Ask for the manufacturer's intended uses, installation instructions, cleaning directions and warranty conditions. Consider pets, chairs with casters, heavy furniture, wet footwear and sunlight in the rooms being renovated. Where one continuous appearance matters, check whether the same product is suitable across each room and how expansion or movement details are handled at boundaries. Thickness affects transitions and door clearance. Colour and texture influence visible dust and scratches, while plank length or pattern affects layout and waste. If you provide the material, arrange for exact product information and a suitable quantity before booking the work. The installer should know whether matching stair parts, vents and trims are available, not only whether planks are in stock.
- Compare maintenance and manufacturer requirements alongside appearance.
- Check availability of matching transitions, stair parts and vents.
Decide what to remove and how the base will be prepared
Removal exposes the real substrate. Existing flooring might be firmly bonded and suitable for a particular overlay, or it might hide unevenness, water damage, loose boards or multiple layers that should not remain. Discuss what will be taken out, where debris goes and whether old baseboards or door casings will be retained. The installer should assess flatness, firmness and the product's stated substrate requirements before choosing leveling, patching, underlayment or replacement. A squeak may call for fastening or repair rather than a thicker finish. On concrete, cracks and moisture conditions can affect the specified system. Do not treat preparation as an unlimited allowance: ask which repairs are included, what assumptions were made before demolition and how additional work will be documented. A photo of the exposed base and a written change description make it easier to understand why a repair was necessary. The new floor's service life depends on this hidden work as much as on the chosen surface.
- Separate removal, disposal, repairs and leveling in the quote.
- Approve newly discovered substrate work before it is covered.
Select the installation method and layout
A floating, glued, nailed or tiled assembly has different requirements for the base, perimeter details, underlayment and use of the room during installation. The chosen product's instructions should guide the method. Discuss plank direction in connected rooms, where a pattern begins and what happens at a long hallway or narrow doorway. Decide whether floors run into closets and under movable appliances. If cabinetry is planned, coordinate its installation with the floor system because some floating products should not be restrained by fixed cabinets; verify the specific manufacturer's direction. For wood-look products, mix material from packages as directed to avoid unwanted colour grouping. For a patterned floor, request a layout review before setting begins. Ask how the team will handle floor vents, access panels and irregular walls. These small details influence both visual continuity and future service access, and they are difficult to correct after the whole floor is complete.
- Ask for the product-specific installation method in writing.
- Approve direction, starting points and difficult transitions before laying material.
Prepare an occupied home for floor replacement
Floor work affects the whole route through a home. Before the start date, identify which rooms must be empty, who moves furniture and appliances, and where belongings can be stored. Confirm whether doors or baseboards will be removed and who will reinstall or adjust them. Plan for access to bedrooms, bathrooms and exits while adhesive cures or finishes dry, where those steps apply. Protect adjacent finishes and agree on dust-control boundaries. Delivery and acclimation requirements vary by product, so follow the exact manufacturer's instructions rather than assuming a generic waiting period. If flooring is one phase of a kitchen or basement renovation, align the schedule with cabinets, trim, painting and appliance connections to avoid damaging a completed surface. Ask which utilities must be available and how the crew will handle pets or household traffic. A room-by-room sequence can reduce disruption, but some continuous installations work better when adjoining areas are prepared together; settle that choice during planning.
- Confirm furniture moving, room access and material storage.
- Coordinate flooring with painting, cabinetry and other renovation phases.
Inspect the completed floor and keep product records
Walk the completed areas in normal light and from the entrances you use every day. Check transitions, thresholds, baseboards, stair edges, vents and the fit at door frames. Open doors and drawers and confirm appliances can be moved or serviced as planned. Ask whether any finish requires time before heavy furniture or regular cleaning; follow the selected material's care instructions. Record outstanding trim, paint or adjustment work in writing. Keep the product name, colour, batch details, manufacturer instructions and warranty information with the contract. Save a practical amount of spare material if it is available, since matching colours or production runs can become difficult later. Discuss how to clean the floor and which products to avoid under the manufacturer's directions. If the work included subfloor repair, retain the description and photos for future renovation planning. A closeout review should confirm that the installed material and every transition match the agreed room-by-room scope.
- Inspect transitions, doors, stairs and trim at handover.
- Retain product details, care instructions and any spare pieces.
Coordinate doorways, adjoining floors and fixed cabinetry
Flooring choices affect more than the centre of each room. Review the proposed finished height at every doorway and beside each retained surface before ordering. A change in product thickness or preparation can alter how the new floor meets tile, stairs and exterior doors. Show the chosen transition profile and its position on the room plan; a transition placed beneath a closed door has a different appearance from one left visible in a hall. Check the selected flooring instructions for movement allowances and the relationship to fixed cabinetry. The installer should follow the actual product system rather than apply one generic approach to every wood, resilient or floating floor. Where kitchen appliances remain, discuss access for removal and replacement after the floor is installed. Raising a finished surface around an appliance can create a different problem from raising the entire appliance space. Door undercuts, trim reinstatement and baseboard painting also need a defined responsibility. Existing painted trim may expose an unfinished strip when its height changes, so compare retention with replacement before demolition. A continuous floor through several rooms can reduce visible breaks, but layout direction and the sequence around retained furniture still need to be resolved. Photograph each junction, label it on the room list and approve the visible finish detail. These small boundaries often determine whether a floor feels coordinated even when the main product and installation are satisfactory.
- Review finished height at doors, stairs and adjoining surfaces.
- Confirm appliance access and fixed-cabinet details with the selected product.
- Identify trim replacement, painting and transition profiles in the scope.
Sequence preparation, installation and return to use
A flooring schedule should begin with an assessment of the existing finish, substrate and moisture exposure, followed by product selection and confirmation of installation instructions. Arrange delivery and storage conditions appropriate to the chosen material, clear furniture and appliances, then remove old finishes where required. Exposed damage or unevenness should be documented and priced before the new surface hides it. The installer can then prepare the base, establish layout, lay or fix the product, complete transitions and trim, and inspect the work. Some products or adhesives need conditioning, curing or protection before normal traffic, furniture placement or cleaning; use the selected manufacturer's directions rather than a universal number of days. If kitchen cabinets, doors or stairs are also changing, their sequence can alter when flooring is measured or installed. Ask for dates for each room, how occupants will enter and exit, and when furniture may return. A written schedule is especially useful when the home remains occupied and only one route connects important rooms.
- Request product-specific conditioning and return-to-use instructions.
- Agree on access, furniture moving and room handover before work starts.
Check approvals when the floor project grows beyond finishes
Replacing a floor covering by itself should not be described as a permit-triggering structural project. The approval question changes if opening the floor reveals a plan to alter joists, change the structure, move walls or install or modify plumbing or heating systems. Toronto's building-permit guide lists structural or material alterations and installation or modification of plumbing and heating among work that can require a building permit. Its examples are not an exhaustive decision for every property, so confirm any expanded scope with the local building department before work proceeds. Ask a contractor to separate the original finish replacement from a proposed structural or service repair in a written change. That change should identify the problem, proposed remedy, cost, schedule effect and who obtains any required approval. If the work remains an ordinary finish replacement, focus instead on product suitability, substrate preparation and the written scope. Do not assume that a permit decision for the new floor also covers unrelated kitchen, bathroom or wall work being done at the same time.
- Escalate proposed joist, wall or service changes for local permit review.
- Document hidden-condition repairs before covering them with new flooring.
Flooring Installation: pricing & scope
Flooring installation across a range of material choices. All figures are CAD, before applicable HST.
Confirm material, removal, subfloor preparation, stairs, trim and transitions as part of the scope.
Your written estimate confirms the work, materials and allowances for your property.What affects the total?
- Area and room layout
- Flooring product and installation requirements
- Existing floor removal
- Underlying surface preparation
- Trim, transitions and access
Frequently asked questions
Can a new floor be installed over the existing one?
That depends on the chosen product, the existing surface and the installation requirements. Request an assessment before assuming removal can be avoided.
What should a flooring estimate identify?
It should distinguish materials, installation, removal, preparation and finishing details so you understand what is included.
Does new flooring need to go under kitchen cabinets?
That depends on the chosen flooring system and the kitchen sequence. Decide this with the installer and cabinet plan before work starts; the answer affects material quantity, movement and future replacement.
Why do flooring quotes with the same square footage differ?
They may include different products, subfloor preparation, demolition, underlayment, trim, stairs and disposal. Ask for each component in writing before comparing totals.
How much flooring should I order?
The quantity should come from the measured room layout and the chosen product. Cuts, plank direction, pattern, breakage and the desire for spare pieces all affect the order. Ask the installer to review the planned quantity before purchasing; a generic percentage cannot account for every floor or pattern.
Do I need to move furniture before installation?
Usually the work area needs to be clear, but responsibility for moving and returning furniture should be stated in the estimate. Ask separately about heavy appliances, fragile items and belongings in closets. Confirm where material can be stored and how access to the rest of the home will be maintained.
What if the subfloor is damaged?
The damage should be documented and the cause assessed before covering it. Request a written repair proposal and price, including any effect on finished floor height or schedule. Approve the change before extra work proceeds and keep a record of what was corrected below the new surface.
Can one flooring product run through every room?
Only if the exact product is suitable for each room's moisture, substrate and use conditions. Entries, basements and bathrooms may require different assemblies. Decide where a continuous surface is practical and where a deliberate transition will give a more reliable result.
Will the doors and trim need adjustment?
Possibly. Removing or adding flooring can change the finished height at doors, baseboards and thresholds. Check door clearance and appliance access before work starts. The scope should identify whether trim is reused, replaced or added, and who makes any door adjustments.
When can I walk on the new floor?
That depends on the product and installation method. Adhesives, coatings and setting materials can have different curing instructions. Ask for the specific restrictions on walking, placing furniture and cleaning the surface, and follow the manufacturer's guidance for the installed system.
Does flooring installation require a Toronto building permit?
The finish replacement itself is different from altering the structure beneath it. Toronto lists structural or material alterations and changes to plumbing or heating systems among work that can require a permit. If the scope expands to joists, walls or services, confirm the specific proposal with Toronto Building before that work starts.
How long will a flooring installation take?
It depends on measured area, product delivery and conditioning, removal, subfloor repairs, installation method, trim and any required curing. Ask for a room-by-room schedule and the chosen manufacturer's rules for walking, moving furniture and cleaning. A labour-day estimate alone does not include all of those dependencies.
Further information
Planning connected work?
Home Renovations
Coordinate improvements to your rooms, layout and finishes in one considered renovation plan.
View serviceBasement Renovations
Plan a lower level that suits your intended use, with existing conditions considered before the finishes.
View serviceKitchen Renovations
Plan a kitchen around cooking, storage and everyday movement, with the layout and finish scope considered together.
View serviceTile Installation & Tile Work
Plan wall, floor and backsplash tile with surface preparation, layout and finishing details in the scope.
View serviceService areas
Flooring Installation across Toronto and the GTA, from our Etobicoke base.